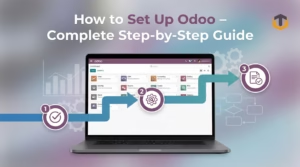
How to Set Up Odoo – The Complete Step-by-Step Onboarding Guide for New Users
Setting up Odoo for the first time can feel overwhelming, but with the right guidance, you can have your system running smoothly in minutes. Whether you’re a new Odoo user exploring the platform for the first time or a decision-maker evaluating Odoo for your business, this comprehensive step-by-step tutorial will walk you through every essential configuration. At TechUltra Solutions, we’ve helped over 300 businesses successfully set up their Odoo instances, and we’re sharing our proven methodology to help you get started quickly and avoid common setup mistakes. In this tutorial, you’ll learn how to create your Odoo account, navigate the dashboard, configure your company information, set up user access, and customize your workspace. By following these steps, you’ll establish a solid foundation for your Odoo Implementation project, whether you’re planning a complete Odoo Customization or a full digital transformation. Why Proper Odoo Setup Matters The first stage of your Odoo journey is crucial. Many businesses rush through basic configuration, only to realize later that they’ve missed important settings that could streamline their entire operation. Proper setup not only saves time during Odoo Implementation but also reduces the need for expensive Odoo Development work later on. Think of an Odoo setup like building a house if you don’t get the foundation right, everything built on top will have issues. The good news? This tutorial eliminates the guesswork. We’ll show you exactly what to configure and why each step matters. If you decide to work with Odoo Consulting services or hire an Odoo developer later, you’ll already understand how your system works, making collaboration much more efficient. This setup guide is for Odoo Community Edition, the free, open-source version. Both Community and Enterprise editions share the same basic setup process covered in this tutorial, creating accounts, configuring company info, setting up users, and customizing dashboards. However, Odoo Enterprise Edition (the paid version) includes additional advanced features like native mobile apps, Odoo Studio for visual customization without coding, advanced reporting, automated workflows, dedicated support, and AI-powered insights. The core setup steps remain identical, but Enterprise users will have access to more powerful customization tools and features. If you’re unsure which version suits your business, our Odoo Consulting team can help you evaluate and implement the right solution for your needs. What You’ll Need Before Starting: Step 1: Create Your Odoo Account and Login Creating your Odoo account is the first and most straightforward step. Let’s break it down: Accessing the Odoo Platform Navigate to www.odoo.com in your web browser. You’ll see the Odoo homepage with the option to start a free trial or sign in if you already have an account. Action Items: Creating Your Account The signup form requires basic information: Pro Tip: If you’re planning a significant Odoo Implementation with multiple team members, use a shared email initially, then transfer admin privileges after setup. However, the best practice is using a dedicated admin email that doesn’t change with employee turnover. Verifying Your Email After submitting the form, you’ll receive a verification email. Open it and click the verification link to activate your account. This step confirms that you have access to the email address and prevents unauthorized account creation. Common Mistake to Avoid: Don’t close the browser or navigate away before verifying your email. If you don’t receive the verification email within 5 minutes, check your spam folder or wait a few minutes before requesting a resend. Logging In for the First Time Once verified, return to www.odoo.com and click “Sign in” (or you might be automatically logged in). Enter your email and password. If you’re logging in from a new location or device, Odoo might ask for additional verification for security purposes, this is normal and protects your data. Success Indicator: You should now see a screen asking you to create your first database or select an existing one. This is your gateway to the Odoo environment. Step 2: Navigate the Main Dashboard and Customize Your Interface Once you’re logged in, you’ll see the Odoo dashboard. Understanding this interface is crucial before moving forward, especially if this is your first experience with Odoo Development or Odoo Consulting concepts. Understanding the Main Dashboard Layout The Odoo dashboard consists of several key components: The Top Navigation Bar: Located at the very top, this bar contains: The Left Sidebar (Menu): This is your command center. It displays all available modules and applications installed in your Odoo instance. By default, you might see modules like CRM, Sales, Inventory, Accounting, and others. The sidebar is collapsible (click the hamburger menu icon) to maximize workspace. The Main Content Area: This is where all your work happens. It displays dashboards, lists, forms, and reports depending on which module you’re accessing. User Avatar (Top-Right Corner): Click here to access user settings, preferences, and logout options. Customizing Your Dashboard View Odoo dashboards are highly customizable. Here’s how to make it your own: Step 1: Access Dashboard Customization Step 2: Add or Remove Dashboard Cards Dashboard cards show key metrics like “Total Revenue,” “Open Invoices,” or “Active Customers.” To customize: Step 3: Configure Card Preferences Step 4: Save Your Custom Layout Personalizing Your Workspace Beyond the dashboard, personalize your workspace: Set Your Preferred Language and Timezone: Example Scenario: If you’re working with international teams and planning Odoo Development or Odoo Customization, ensuring everyone has the correct timezone prevents scheduling conflicts and data timestamp issues. Pro Tip for Implementation: When planning an Odoo Implementation, document these preference settings for each user role. This ensures consistency across your organization and reduces time spent on individual configuration during training. Step 3: Configure Company Information and Basic Settings This step is critical and often overlooked. Proper company configuration affects invoicing, tax calculations, reporting, and overall system behavior. If you’re working with an Odoo Consulting partner or planning to Hire Odoo Developer, this groundwork makes their job significantly easier. Accessing Company Settings Navigate to Settings (gear icon in the top-right) and select “Companies” or go directly through Settings > Companies > Manage Companies. Configuring